Showing posts with label Recipe's. Show all posts

Friday, January 3, 2014

Most Read Posts of 2013


As we head into the new year and reflect on the previous year, I wanted to share ten of the most read blog posts of 2013.

This post was originally from 6/2011 and just reposted last month, but my recipe for Easy Bacon and Cheese Quiche was popular this year.  A lot of you were looking for an easy and yummy idea!!
Apparently many of you can relate to How Our Life is "Normally" Crazy as this was a most read post of 2013!!
 
Interested on Saving Money When You are on Vacation and Eating out?  Many found my tips helpful to have a frugal vacation!
 
Letting Your Husband Lead became a hot topic for many of us!  How are we doing in this area?
Many of us were also looking at our marriages, and 8 Ways to Bless Your Husband had some helpful information.
 
While I also wrote this post on Making Your Own Fabric Softener in 2012, it was also clicked on many times this past year!
 
You found My Transition from Pants To Skirts interesting and I was blessed by how many of you were considering the same things.


My Stockpile Challenge encouraged many of you to start the same thing.
 
How Our Christmas Is Free shows that with a little effort, you can get Christmas gifts for free.  Now would be a good time to start some of these ideas and see just what you can get for free this year!
 
My series on the Proverbs 31 Woman had us thinking each week about how we can become better wives and mothers.  I'll be starting this up again soon!
And the number one most read post continues to be Why I Wear Skirts.  Whether your just curious, or thinking about the same thing, this post explains my heart as the reason for why I wear skirts.

I have lots of ideas for my blog for the new year, and thank you for joining me along this journey!
 
Blessings,


Homestead For Him now has a Facebook page.  Like what you see here, won't you like my page?!  Click the like button on the sidebar or go HERE!!
 

Friday, December 20, 2013

Simple and Delicious:Easy Bacon and Cheese Quiche

I'm taking the rest of the year off to spend the Christmas holiday with my family.  This post is part of my "best of 2013" series.  This recipe would make a perfect Christmas morning breakfast!!  Have a Merry Christmas!

I make this egg quiche for supper quite often.  It is so simple and you can mix it up by adding different cheeses or using ham or sausage instead of the bacon.  When I make it, I double the recipe and make 2 quiche's to feed our family. {I think I could start tripling it since my boys have such hearty appetites!}  The original recipe came from Nancy at Homemade Blessings.  I recently made it with a little bit of "help" from my favorite helper!  Here's the recipe....

1/4 - 1/2 pound bacon~cooked and crumbled
1/2 cup onion
5 oz shredded colby-jack cheese
3 oz shredded parmesan cheese
9" deep dish pie crust
4 eggs, lightly beaten
1 cup half and half

Preheat oven to 400 degrees.


Add cheeses, onion and bacon to the pie crust (I use a refrigerated ready-made pie crust).

Mix eggs and half and half.(I also add some pepper)
 

Pour egg mixture over cheese mixture.

Bake in preheated oven for 15 minutes.  Reduce heat to 350 degrees and bake an additional 35 minutes.

Enjoy!!
Blessings,


Homestead For Him now has a Facebook page.  Like what you see here, won't you like my page?!  Click the like button on the sidebar or go HERE!!


This post originally posted on 6/22/2011.

Wednesday, November 27, 2013

Thanksgiving 2013~Turkey Stock

 
While the thanksgiving turkey can last for a while after the big day, you can also make that bird go farther by using the bones and making a delicious and nutritious stock.
 
Take all the bones and throw them into a large pot.  Get them as clean as you can {because you want to use all that meat!}, but don't worry if there is still some meat on them.  It will add more flavor to your stock.  Throw in some vegetables into the pot as well.  I usually use onions {leave the peels on them}, celery, carrots, and green peppers.  I also add a generous sprinkling of pepper and garlic powder as well.  Then add a splash of vinegar to the pot.  The vinegar helps draw healthy minerals out of the bones.
 
Cover the bones and veggies with water.  Heat it until it is just about to boil, then simmer.  You can simmer it for a few hours or overnight {I'm not a fan of leaving something on the stove overnight, but maybe in a crockpot I would consider it.  Unfortunately, I don't have a crockpot large enough!}.  I had mine on the stove for about 4 hours or so.
 
Strain the veggies from the broth and your ready to go.   I canned this batch, but you can also put it in the freezer.  You now have healthy, delicious homemade turkey stock to make soups with. 
 
A frugal, healthy, and easy way to make your own turkey stock.  And you were going to just throw those bones in the garbage!!
 
Blessings,


Homestead For Him now has a Facebook page.  Like what you see here, won't you like my page?!  Click the like button on the sidebar or go HERE!!


The BEST {And Easiest} Gravy Ever~Thanksgiving 2013


I am not a gravy lover.  My grandma would make the tastiest gravy, and when she died, my desire for gravy died, too.  I just don't like the taste of store bought gravy, and when I tried to make my own, it never tasted like grandmas.  

So I became one of those people who just has butter with their potatoes.

Then a friend gave me a recipe and said it tastes just like grandma's.  I wondered when she was ever at my grandma's house, but graciously took the recipe.  I reluctantly tried it and was surprised to find....

It tastes just like grandma's!!

This recipe is super easy to make, and the best part is NO LUMPS {A problem I've had when I previously tried to make my own gravy}!!  So in honor of all the grandma's who've spent countless Thanksgivings making their own gravy, lets all make our own gravy this year, too!!  Your family will thank you for it, and you just might start a new tradition!

Easy Turkey Gravy

1/4 cup butter
1/4 cup flour
1/2 tsp black pepper
2 cups pan drippings

In medium saucepan, melt butter.  Add in black pepper and flour.  Whisk continuously over low heat for 3 minutes.  You'll notice a change in the consistency of the butter/flour mixture as you whisk.  When it goes from pasty to a thinner consistency you have it right.  Add in the turkey drippings.

Continue to whisk over medium~low heat until bubbly and the gravy has thickened.  This should also take about 3 minutes.
Serve with your mashed potatoes and turkey and gladly accept all the praise you'll get for the delicious gravy!


Enjoy!!

Blessings,


Homestead For Him now has a Facebook page.  Like what you see here, won't you like my page?!  Click the like button on the sidebar or go HERE!!


Tuesday, November 26, 2013

Thanksgiving 2013~Squash Seeds, A Yummy Snack!


When you make that Thanksgiving Squash, save the seeds from it and make a delicious, easy, and frugal snack with it.  If you love roasted pumpkin seeds, you'll love this, too!

Place the seeds you spooned out of the squash into a bowl.

Add water to the bowl.  This makes it easier to separate the seeds from the other "gunk".  You'll need to get your hands in there to loosen the seeds.
 Pour the seeds through a strainer and rinse with water to remove any leftover "gunk"!  Then pat dry with a towel.
 Place on a cookie sheet, spritz with olive oil and sprinkle with salt.  Bake at 325* for 10~20 minutes.  Cool off and enjoy!
Does the lure of a tasty snack want to make you go out and get a squash?  Give it a try!
 
Blessings,


Homestead For Him now has a Facebook page.  Like what you see here, won't you like my page?!  Click the like button on the sidebar or go HERE!!


Thursday, November 21, 2013

Thanksgiving 2013~Squash~~The Neglected Side Dish


Squash may not be neglected in your family, but in mine it sure is!  I am the only one who loves this creamy, tasty vegetable.  I couldn't even get my family to eat it by telling them it was technically a fruit, not a vegetable!  Anyway, in an effort to get squash into more Thanksgiving dinners, I'm sharing the easy way my grandma made it.

First you start with one or two wonderful looking squash.  Don't be intimidated by that tough outer skin.  Once you get past that, you'll be well on your way to a delicious side dish!
Cut the squash in half lengthwise.  This is how it will look when you open it up.
Scoop out those seeds.  Just grab a spoon and spoon them into a bowl.  Save these seeds.  They will make a delicious snack for later!! 

Put a pat of butter in each well from the scooped out seeds.  Sprinkle with a bit of brown sugar and place in a preheated 375* oven. Bake for 30 minutes or until soft. {it took closer to an hour for both of my squash to completely cook}
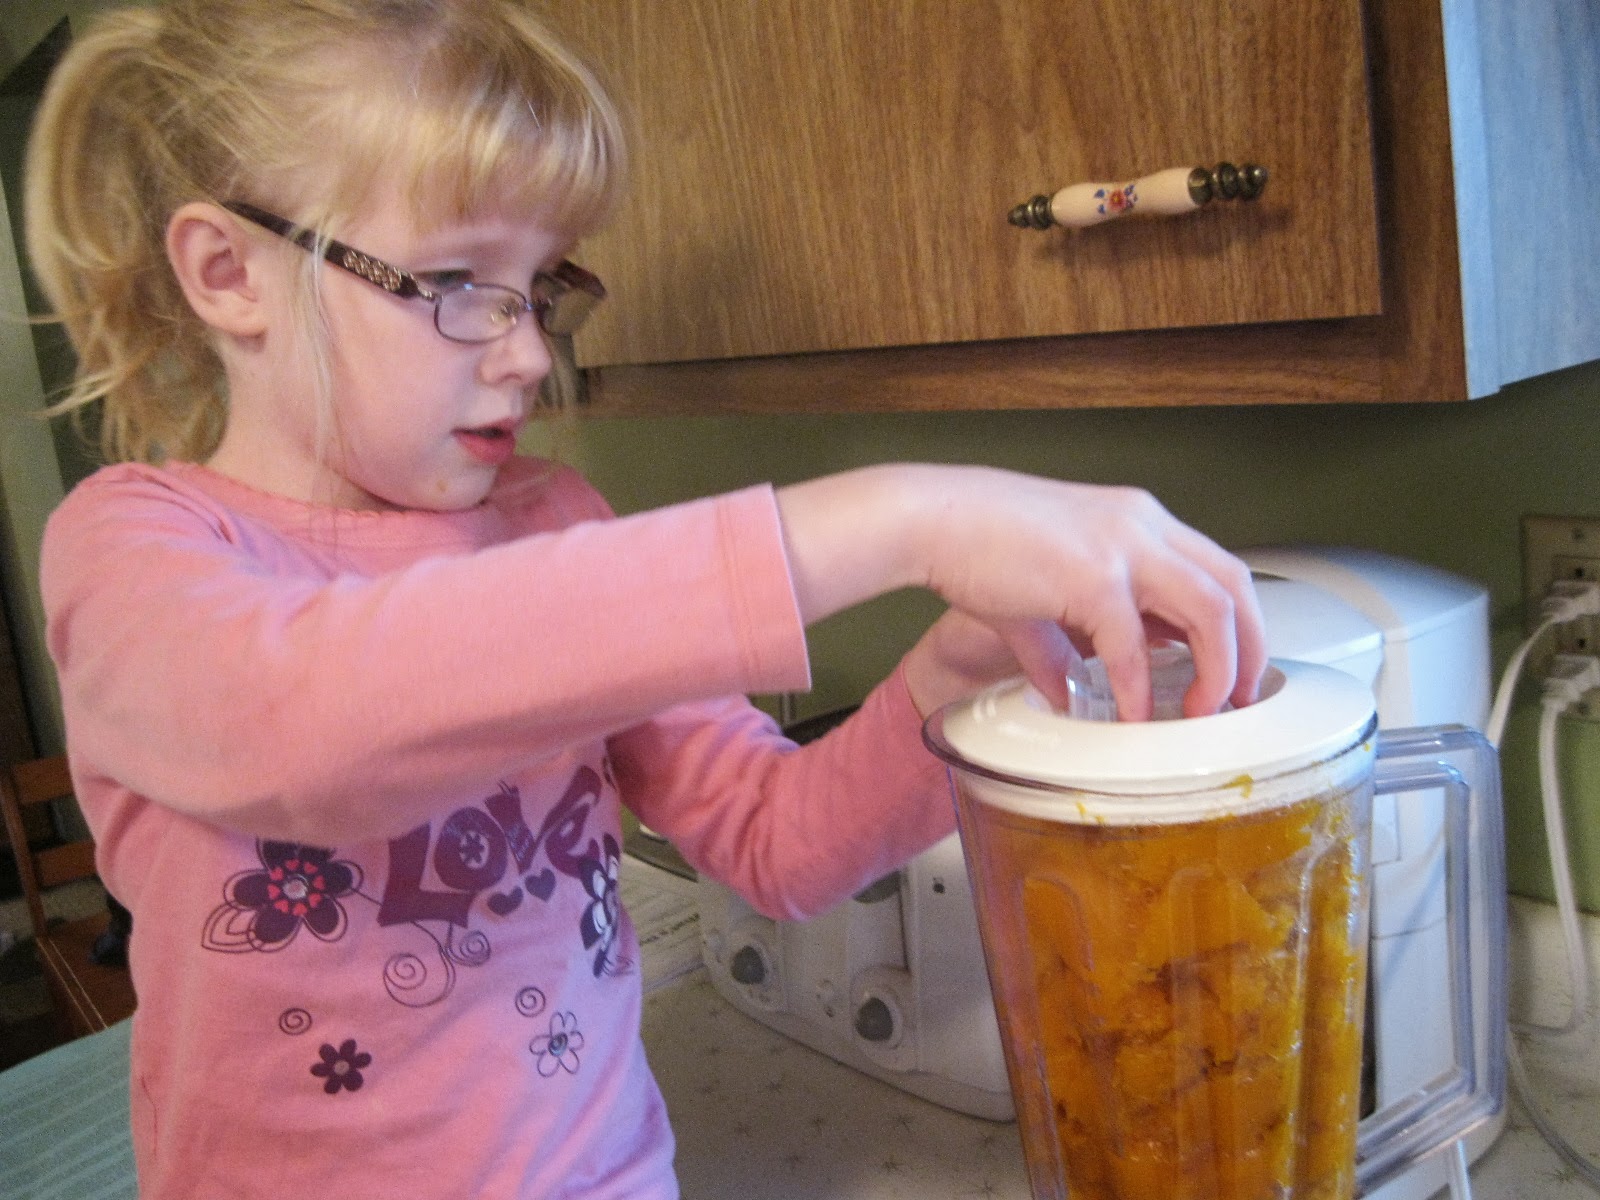
 When the squash in soft, scoop it away from the skin.  {sorry, forgot to get a picture of that step!}  Then place the squash into a blender.
Blend for just a moment or two.  I don't like to blend too long, because then it gets the consistency of baby food {and then I don't want to eat it either!}, but enough to get the lumps out and make it creamy.  Add pepper, salt and a little more brown sugar if needed.
ENJOY!!
 
I'm curious, how many of you are squash lovers?  Have a delicious Thanksgiving dinner!
 
 
Blessings,


Homestead For Him now has a Facebook page.  Like what you see here, won't you like my page?!  Click the like button on the sidebar or go HERE!!


Wednesday, November 20, 2013

Thanksgiving 2013~Pumpkin Pie


One of the staples of Thanksgiving in my opinion is pumpkin pie.  I know many of you make "real" pumpkin pie, even rolling out your own crust.  I take the easy way out and use canned pumpkin and ready made pie crust.  I love my pie, but also love saving time to enjoy Thanksgiving dinner.  Here's the simple, yet yummy recipe!

 
Pumpkin Pie
 
1 can (15oz) pumpkin
1 can (14oz) sweetened condensed milk
2 eggs
1TB pumpkin pie spice
pie crust (I cheat and use the ready made roll out kind!)
 
Mix pumpkin, milk, eggs, and spice until smooth.  Pour into pie crust.  Bake at 425* for 15 minutes.  Reduce temp to 350* and bake 40 minutes more.


I can't wait until Thanksgiving dinner to enjoy a piece of pumkin pie!

Blessings,


Homestead For Him now has a Facebook page.  Like what you see here, won't you like my page?!  Click the like button on the sidebar or go HERE!!

Tuesday, October 29, 2013

Fun DIY Project~Make Your Own Butter

If you're looking for a fun and cheap activity to do with your kids, this is it!!  I recently did this with my homeschool co~op class and they loved it!  Since then, Sweetcheeks has been asking to do this almost every day!

It really is quite simple!  You just need some heavy whipping cream and a glass jar.  A hand mixer works well also, but then you'd miss out of the "funnest" part {sweetcheeks' description}!

Add some cream to the glass jar.  Any amount is fine.  If you want a small amount of butter, just add a small amount of cream.  If you're looking for an upper arm workout, then fill that jar!!  You can also add a pinch of salt if you want.

Next step.  Shake jar. 
 

Shake some more. 
 
Keep shaking.
 
When you get tired of shaking, have someone else shake the jar!
Look, you now have whipped cream.  Too bad that's not what we're making today!

Keep shaking!
 
Almost there!

Shake your entire body!!

Look, you now have a soft lump bathing in milk!

You did it!!

Yep, that's butter!

Strain the milk from the butter.  Save that milk.  This is buttermilk and can be used in recipe's.  Then wash the butter in cold water.  This gets the buttermilk off the butter which can make the butter go bad.

Put your butter in a container, and enjoy!

Blessings,

Homestead For Him now has a Facebook page.  Like what you see here, won't you like my page?!  Click the like button on the sidebar or go HERE!!